Showing posts with label Make New. Show all posts

Thursday, March 24, 2011

Well I am finishing off my Spring Challenge projects... not got to make all of the items but least I still have a plan to follow. I have been wearing my linen navy maxi skirt and I love it, it swishes so well and in the Australian sun it provides some shade for my pins (yes it is autumn here, but still hitting a sunny 33, phew). Will post pictures soon of all my finished items.


In the meantime the simple lovely-ness of ric rac roses. They are so cute. I was brought to the attention of these lovelies while browsing Wardrobe Refashion blog, which lead me to twobutterflies blog and I saw this lovely image.


So lovely, I am sure that you would want it... well pop over to twobutterflies blog before the 31st of March and leave a comment to be in for winning this ric rac rose necklace. Sweet.

If you want to attempt some ric rac roses yourself I looked for some links. On Pintangle there are instructions for two types of roses, and the link that twobutterflies links too Nostalgic Needle Art. If you want your rose to have a flat bottom Crafty Pod worked it out by ripping it up, ah yea!

I see a ric rac rosey future.

In finishing check out this super duper video from Swonderful in Wellington, NZ.


Papercup - Alphaville - Winter 2011 from Micah Sargisson on Vimeo.


xx

Wednesday, February 23, 2011

Colette Spring Challenge: In Progress

Hiya.

Well I have been trucking along with my pieces for the Colette Spring Challenge. There are a few items that have changed. I have not made the long linen bias skirt from the new look pattern. Instead I made it from the  1970's pattern I found at the op-shop for 50c. I made the long skirt on the right. Easy peasy.


Don't they look happy, maybe its because they are wearing fashionable clog shoes, ha ha.

Below is the nearly finished article, just got to hem the mammoth hem and put in a hook and eye...
and an iron.


Then I did a toile of the vintage 1970s blouse pattern in a fabric that I have had in my stash for ages, it fitted really well! So it is a wearable toile, yes! Just going to tone down the puff on the sleeve cap a wee bit.


The purple skirt is finished. I have made this skirt before so it was easy to get it together quick smart. I used a wonderful breathable purple linen.


I really love the patten for the godet skirt, it swooshes wonderfully. Whooooooooo!


So now for some hemming, hook and eyeing and erm more sewing of godet skirt.

The wrap skirt I wanted to make may be cast aside. I am trying to stash bust with this challenge and the material I wanted to use is not enough. 

Just wanted to say to any New Zealand readers that my thoughts go out to you at this time, such a terrible time for those involved in the earthquake. Hope you and your loved ones are safe.

xx

Tuesday, February 15, 2011

Colette Spring Challenge: The Patterns

I looked at my inspiration board and then at my wardrobe. What I really need is casual separates. So then I raided my patterns and fabric stash, as I don't really want to buy an thing for this challenge.

New Look patterns are quite cheap and on the up side I never really have to make many changes to the patterns so I have quite a few of them. I am going to make the t'shirts from some fine cotton knit that I have, stitch them with cotton thread and then dye them. The shorts are going to be made from a cotton sweat knit that I already have in the dusky pink colour.

The faux warp skirt is from a lovely slinky poly fabric in the coral peach. The vintage blouse is going to be from white cotton Swiss dot fabric. The godet skirt is going to be made with the material in the swatch, which is silk.

Both the skater and long bias skirt will be made in a cotton/linen blend, which I do have in navy. i have a purple colour but it is a bit dull so I will dye it a deeper purple.

Right better get cutting out... think I will make the godet skirt first :)

xx

Monday, February 7, 2011

Spring Palette Challenge

I have decided to take up the Colette Spring Pattern Challenge . The idea is to collect inspirations, fabric and patterns and make these into clothes or accessories by March. I am a little behind but here is my design board and colour palette.

My main inspiration is from some images I took when I was in Scotland this year, I love the contrast between the white of the snow and the amazing pastels in the sky (main background picture).

I also went to see the Ballet Russes exhibition at the V&A while in London, it was incredible and I loved the detailing one costume in particular (second image from bottom right). Even the garments in the poster were very sweet (second image from top left).

Out of my Japanese fashion books I loved this Suffolk puff headband (top right) and cowl neck drop waisted dress (second image from bottom left). I also love the detailing on the red drop waisted dress (bottom right image).

I think Michelle Williams has great style and I have had this skirt in my fashion folder for a while now ( middle image bottom).

The floating images of the two tops in the upper left are techniques I would love to try. Beading and ribbon detailing. On the sleeves of the bow blouse the stripes are made by making thin tubes of the main blouse material and then sewing it on to the plain sleeve fabric.

Lastly the vintage Dior Cloche, love the colours and feather detailing. Want to make a hat as an accessory within this challenge.

Right, now I am going to get on a select fabrics and patterns!

xx

Tuesday, October 19, 2010

Undies update - trim time

I went shopping on the weekend to get some trim for my first project from The Undies Book. I decided that I wanted to put some lace on the camisole, not just as trim but integrated in to the cups and then use the eyelet cotton trim as straps.


I found an good article on threads website entitled 'Create Couture Lingerie' by Alexandra Armillas. She used to make lingerie for Dior, so I reckon she knows a few things. I had been thinking that I am using non-stretch fabrics and might add some buttons to the centre front, but in the pictures on the article the buttons are to the side and it looks very sweet.

Alexandra recommends photocopying the lace and placing it on your toile to preview the design and I will do this. I am getting quite excited by this project and I think my sewing mojo as returned! Yipeee.

Here is the fabric and trim together. I tea dyed the cotton eyelet to give it that vintage feel and blend with the lace better. Next step is to make the patterns.

xx


Sunday, October 10, 2010

Flying shortcake

About approx 365 moons ago I posted that I was inspired to make a quilted jacket. Below is the blog image I put up.


Reading through this blog I realised that I have many UFO projects (un-finished objects). So I made a list of them (made my cheeks blush) and I am working my way through! I did buy material, the bamboo/cotton wadding , pretty backing material and cut it out... and well that was that... until now. I have been busy tacking the layers together. 


I did ask one of the ladies at work about my tacking and she said I would have to redo. I am to start from the middle and work my way out on each piece. This is so that I do not get any fabric bubbles when I  latter quilt them. I am only quilting the body and main part of the hood. I should have remembered this technique from tailoring class, but a jog of the memory cells is always good.

So why I am making a quilted jacket for the Australian summer? Well that's because I won't be here for most of it... I am going home to Scotland for the festive season! Yipeeeeeeeeeeeeeeeeeeeeeeee! 

 In celebration of this news I made a yummy afternoon tea. Strawberry and rhubarb shortcake. There was enough of the fruit left to make some jam too. 


 In celebrations of this news I made a yummy afternoon tea. Strawberry and rhubarb shortcake. There was enough of the fruit left to make some jam too.

Yum, yum for my tum.

xx

Wednesday, September 22, 2010

Minnie not so minksy

Hello. Do you remember me? Probably some vague memory in the shadows of your mind. I have not been posting due to a lack of anything very interesting to say and a real dip in my creative mojo. But I do have one thing on my side, continuity. To follow on from my last post I did make that 1970's pattern from the fabric and well here it is (sorry for the no so great pic). I have made another dress and a skirt but have not got around to snapping them yet.


It is hard for you to tell if I look like a retro pottery vase in this top and skirt combo, as I am not in it, but rest assured I do not, in fact I look more like a retro printed glass vase, as Doug pointed out that (while I was standing in the sun lit door way asking 'Do you like it, do you, really do you?') that it may cover my body but you can still see my bra and knickers, tres see through.Oh faux pas!

So I have decided to remedy this by making a cotton petticoat out of my Undies book. Oh yes, the first project out of the book. Here it is in all its illustrative glory.


I have to find some suitable fabric for this project and so will go a hunting. In the meantime I have been enjoying reading this blog Tilly and the Buttons and its on my blog roll from now on.

Ta ta xx

Monday, August 2, 2010

Return of the minks

Hello. I have not been blogging because I have been, unpacking all the boxes for the house, gone to a wedding, gone on holiday, looked after a sick dog (who is all better now) and well I have been working as a costumier!!! Yipeeee.

I am currently working at the Queensland Ballet for their 50th Anniversary Gala Performance. You can book tickets and see the fantastic line up of performances. I can't tell you what I making, but it is so pretty.

I have been planning my next sewing project now that I nearly have my new sewing room organised. I really adore Danish Royal Copenhagen retro pottery. My favorite pattern is on the little dish below.


It just so happens that I found some material that really looks like the pattern above and I plan to keep the retro theme by using a pattern from my stash that I picked up in an op-shop in New Zealand.


I am going to make the separate skirt and top so that I can wear them with other tops and bottoms. Yipee for retro goodness, but lets now hope that I don't turn out looking like a retro pottery vase!

xx

Wednesday, June 16, 2010

Swings and Roundabouts

I can now officially work and live in Australia as I got my visa! I just had to go back to New Zealand to get it... so that's were I have been! It was a chance to see friends, drink cups of tea ( and the odd cocktail), get some wonder op-shop finds and add to my material stash.

I took the plunge a couple of weeks ago and bought two Collette patterns, Macaron and Ceylon. I had made the Mini Madeleine bloomers from the free pattern on the Collette website and the pattern was fun and a great fit. The Ceylon dress is so pretty and Casey made such a great job of hers that I really wanted to get down to it and make my own version.

The pattern itself is soooo pretty!


It is an envelope that turns into a bound book with the instructions and the pattern in the back sleeve.


I have some material in my stash that will be perfect for this 1940's inspired dress, I just have to wait until the stash clears Aussie customs along with my sewing gear... oh how I miss it all.

One other book to add to my library is The Undies Book by Nanette Rothacker.  I got mine on Esty.


What a plethora of under wear patterns. I have really wanted to be able to create my own camisoles, bras and slips as I always hanker after luxury ones I can not afford. I reckon from all my left over pieces of silk etc I can make some panties and lounge bras. Whoo hoo, before you know it I will be wearing fluffy feather mule slippers and Doug will think he is living with a Hollywood starlet of yester year.

Now in reality, one other thing about this edition of the book is the illustrations. I just love the them, art nouveau with a dash of folk loving 1970s style.


So cute! There are 25 patterns in this book and I intend to make every single one of them, even the Crocheted Victorian Valentine Undies and the Knitted Ski Snuggies ...so I will add a category called The Undies Book to my list. This may turn in to be my life's work, haha, finally finishing those snuggies for my 60th birthday, te he.

I got some rather nice op-shop finds while in NZ, but I will leave that for another day. Have fun.

xx

Tuesday, March 23, 2010

Baggy Lady

Hello. Looking through my posts it has been a looooooooooooooong time that I did a show and tell of something I have made. So ta da here is something that I have never made before, a bag.

I bought a lovely bag before I started my costume course and it was my faithful friend all through those two years. But alas it was looking a tad scruffy and the zips had broken and it made me sad. Yet I could not throw it out, instead I gave it a make over!

I downloaded the Anna Boho Bag pattern from Burdastyle and taped it all together. I had some fabric from a sale in a textile shop in Welly, called D Alexander (which is were I got my material for my major work corset, amazing textile shop!) and I thought they would work well together.


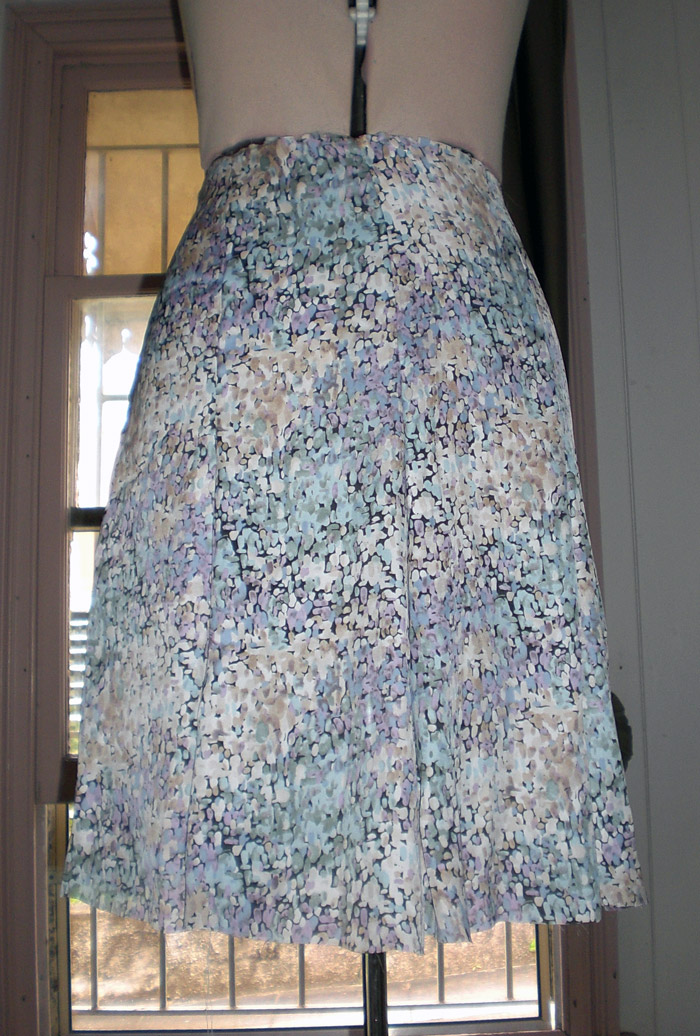
Close up of the old bag fabric, can you see why I did not want to put it in the landfill to un-perish, so pretty.


I cut out the largest section and found that it was too small for the base of the Anna Boho Bag pattern. I decided to just put a big ole box pleat in the middle of the floral material I was using as the bags main body.


I cut up my ole bag and was able to reuse the strap and 95% of the existing outer material, yay! I used an old plastic folder to reinforce the bag bottom and some waterproof material from my stash for the lining.


I then I sewed it all up, the instructions are ok and I found it that it went together really easily. Because I had my own strap I did not make the fabric one from the pattern and made loops instead.


I used extra strong thread that you use to sew jeans material with. I then made the draw string tops using thick chunky cord and toggles from my stash.


My old bag material is used on the base of the bag and the corners, I think it complements the material I used well. You can see my box pleat in the middle.


I love the pockets on this bag, very handy for mobile and keys without endless rummaging!


Here is the final result in all its glory!


I did add the tassels from the pattern but they just looked a bit naff as my ole bag material is plastic vinyl erm they looked cheap so I took them off. I love it! The inside does not have any pockets but the pockets on the outside are great for me as I tend to lose small things in bags no matter how good the pockets are inside the bag.

I rated this pattern and one of my friends already wants one!

xx

Monday, March 15, 2010

I will miss you the way you miss the sea...

The reason that I have not been around this blog is because I have had to make one of those life decisions with Doug... we are moving to Brisbane, Australia! In erm like 4 weeks...

He got a job offer to good to refuse and a sub tropic winter sounds alrighty. I have been a bit of an emotional fair ground ride because I will miss Wellington and New Zealand soooooooo much. I really love it here and have so many great friends... yet on the positive that means I have so many reasons to come back and visit.

So apart from packing the house, getting the dogs over there and applying for my visa I have been freakin out in wardrobe terms. I was coasting through this summer with not a large selection of summer wear. I thought during the long winter I would make my summer wardrobe but hey its kinda summer all year round in Brisvegas... well to a Scottish lass it is :)

Which means I have to get snappy and sew some suitable tops and erm skirts. Phew!

So I leave you with pictures of my dress and hat from the Wellington Cup and ask you to bear with me on irregular posting while I move countries (again).


Ok, I should have ironed the dress but I did when I wore it. I wanted a 1950's shape with swag pockets and I added a deep sweetheart neck line because I suit them. I drafted from the waist up and used a retro 1980's pattern for the lower half. I love the fabric...a tad rococo don't ya think?


The fabric on the dress was so strong that I keep the natural look of the straw, but lowered the crown for a more 1950s shape. Then I added bows, bows, bows and of course some veiling dharling!

Here is me on the day with Amy and her entourage...


Amy is the lady in the middle picture wearing her fantastic creation! Want a close up of her hat...

Is it not fabulous?! Here is another of her wonderful outfit... outrageous!

Catch you soon
xx

Thursday, February 18, 2010

Sometimes love just ain't enough

I did go and sew and I had a little disaster too. What seems like another century ago I downloaded and started to cut out the Ute pattern from BurdaStyle, as I mentioned yesterday. What I did not mention is that I printed it wrong. I never checked the square to see if it had printed out the right way.

Hence the sizing was way out. So I fiddled and meddled (with much frustration) and I was going great guns and it was looking pretty cute, cue pic below...


Then just at the last moment it ripped! In the armhole, beyond the seam line. So, so, so ANNOYING.


Yup I got mad and decided that sometimes, very rarely you have to make the decision to give up and move on. I have just enough to cut a new panel... but its back on the UFO pile and ... erm ... right at the bottom.

To smooth out my nerves and make me feel like downloading and taping A4 sheets of paper in to a pattern are worth it I made up the Madeleine Mini-Bloomers from Colette Patterns. It was a free download and by golly I they wiped themselves up in a thrice.


I have been wanting to try one of these patterns for a while and this little item of lovely makes me want to try out the Sencha and Ceylon patterns. I will use these for night time pursuits but intend to make more as they are ideal for under a skirt in windy Wellington.

While rummaging around the gallery on Collete Patterns I linked to Casey's site (she made a divine Ceylon) and it is rather yumsious. One more to add to the blog roll.

I am now going to assemble some pictures of my Wellington Cup outfit for another post.

Ta ra for now.

xx

Tuesday, December 22, 2009

Summer shorts...

In between all the studying I did manage to make some shorts for summer! Yipeeee, I got to wear them on the weekend for some very stylish gardening. I bought the material ages ago as a remnant for $15 and I got the pattern in an opshop trip.


I made a tolie out of some flannel and made them into winter PJ's, you can read about that on Wardrobe Refashion. They brighten up my white and pastey legs, he he.


I was also lucky and won a giveaway. Emily from This Is Emily Kate was giving away a spare copy of Burda World Of Fashion and I won. The sun is shining. Thanks Emily :)
Check out her blog as she is always making wonderful garments and collecting very sweet ceramics. Plus her kitty cat Edie is very cute indeed and her Procrasintation Station is amazing.

xx

Sunday, December 13, 2009

Lazy, hazy days

My oh my I just looked at the last entry date for my blog and was a wee bit surprised how quickly time has speed past... but the sun has been around... I have no more studies... erm... I have been on holiday... I am a slacker... so sorry for the lack of posting.

This post is about my graduation dress that was inspired by vintage Lanvin and Christopher Kane.


I used my pinking tool to create scalloped edges on black silk organza and then used this to create a modern texture, inspired by Mr Kane. I placed this on top of a black drop waisted dress with petal sleeves, lined in dusty light pink. I used pink silk organza to make a small detail on the sleeve to lift the garment.

The black material that I used for my dress was vintage inspired Japanese cotton. Now I have removed the black silk organza (ready to pop back on of course if needed) I have a wonderful LBD.

I also made a head piece to go with my outfit and a small clutch. On my wrist strap for my clutch I placed a vintage button that I picked up from Salvage in Auckland, it is so cute with two swallows and I plan to make a print for a t'shirt from it.

In our graduation ceremony instead of a black cloak and mortar we receive a cloak made by a fellow student and we get to keep it! I received a stunning cloak made by one of the now second year students in the costume course Michelle. It was perfect and has the most adorable bunnies in faux fur as decoration, with black feathers to top it all off.

That's Doug my partner too, he needs to get some posing lessons :)

See you soon-er.

xx

Friday, October 2, 2009

Fringe benefits

I needed to make something for my night out at World of Wearable arts... WOW in another word. The dates for the show are half way over and I can't think why I have never mentioned it before for in a Make a Date post! I went on awards night and the array of costumes or really works of art are quite amazing. But I needed some thing quick to go with my Graphic Ruffle skirt and black shirt (from my $20 bag) that I was going to wear... accessory time.


I saw a similar necklace on online magazine N.E.E.T via a post from Sally Jane Vintage and I thought I would attempt to make one. Here is what I did.


1. I got my supplies together. Some upholstery fringing in different colours and lengths. Length of gold chain and links from the bead shop (but you could reuse and existing chain) and got out and needle and thread and jewelry tools!


2. I arranged the fringing the way I wanted it for the finally placement and sewed them all together... with invisible stitches. I then made up my chain but forgot to take pictures, sorry.


3. The next step was to attach the fringing to the chain. To do this I doubled up a thread in a colour as close to the blue fringing (the one at the back) as I could find. Then I whip stitched it to the chain.


It worked and looked really good with my skirt and I think it will work well the a white tee and jeans too. Now for the finally hat installment, it is Make do and Mend, yippeee!


Click to download the pages from my workbook for my Make Do and Mend Hat. Just leave a comment if you have problems.

xx
Related Posts with Thumbnails